(Mostly) FO: Haiku

It seems that all I needed was a leetle bit of encouragement to get this baby done. A carrot on the end of a stick as it were. Just posting my dilemma encouraged me to sit down and whack out the last little bit of garter stitch that was left on the body. One viewing of Batman and some down time with the girls, and there she was...

Haiku

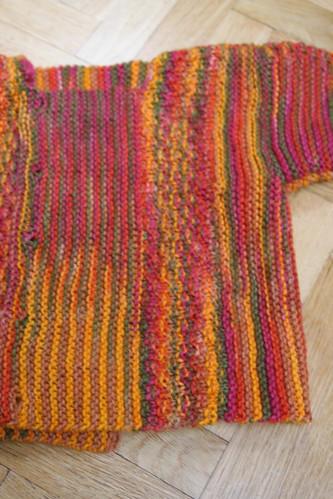
Boo's Haiku in all it's boxy glory.
Yarn: Lion Brand FIsherman's Wool that I dyed, oh...four years ago? using Wiltons cake dyes. One of my first ever dyeing experiments. I went overboard on the colors a bit - five was too many - and it's been sitting in my stash ever since. I used about 1.5 skeins.
Needles: US 8/5.0 mm straights
Start/finish: 7/7-8/9/09
Gauge: 4.5 stitches/9 rows per inch in garter stitch
Comments/mods: I whizzed through the start of this baby in no time flat, and stalled out with 3 inches of garter stitch left on the body. I guess my need for mindless knitting passed fairly quickly! But I was dying to start the next socks, so I got back on the horse and finished up in just a couple of days. Once the knitting was done, I paused briefly to wind the yarn for the next sock project, and then sewed up the seams and set in the sleeves. I have not yet put any buttons on, but that should be easy to accomplish before it gets cold.

Haiku

I actually like how the pooling turned out on this, splitting into yellow/brown and pink/orange sections with the green bleeding over into each. Unfortunately, novice dyer that I was, I didn't quite rinse the yarn enough, and after each session with this stuff my fingers were a lovely fuschia color. That might also have contributed to the lack of progress for a while.

Haiku

I was curious to see if I could get the sleeves to match, so I started at the beginning of an orange section for the cast-on edge on both and managed to get them pretty close. The next big debate was whether to have the pink/orange side or the yellow/brown side face forward. I like pink and orange better, so that's what faces to the front. The nice thing about this pattern is that the pieces are reversible, so if you don't like the color combo on the "RS" of the sleeve, you can flip it inside out, designate that the right side, and carry on your merry way.

I showed this to Boo when it was done and her response was...minimal, to say the least. She looked at it, looked at me, and wandered off to look for her animules. Hopefully she'll actually wear it this fall, and there's enough yarn left for a hat and mittens if she's really lucky.

Right. Lucky. Lucky in that she's short and her mother dresses her funny.

FO: Devil's Pink Cardi

Oh wow. A full sweater from cast-on to finished item in 2 weeks? Sign me up for more of these...OK, so I can't wear it, but hopefully the intended recipient will.


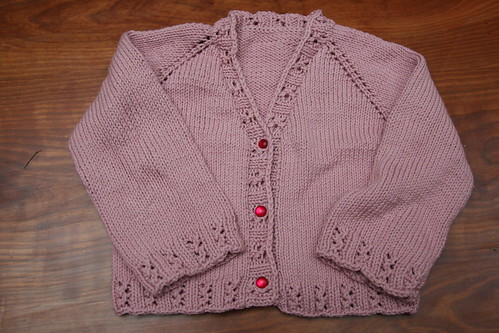
Devil's pink cardigan

Pattern: standard top down raglan a la Barbara Walker, with YO increases on either side of the raglan seam
Yarn: Brown Sheep Cotton Fleece, Victorian Pink, 2 skeins
Needles: US 6/4.0 mm
Buttons: from Joann's
Start/finish: June 3 - June 16th for the knitting, finished blocking and sewing on buttons June 18th.
Gauge: 6 sts/inch
Comments: I used the basic recipe in Knitting from the Top for a raglan cardigan. I increased every fourth row along the neck edge for the V neck until 3 stitches short of the final number I needed, when I switched to every 3rd row. It was then straight knitting until the ribbing.


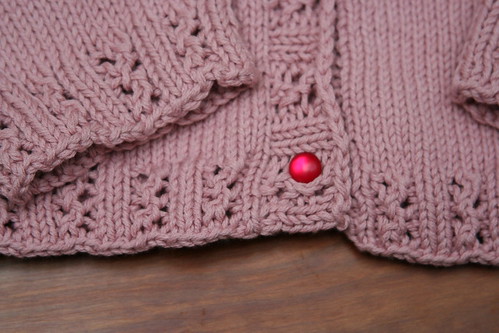
Devil cardi ribbing

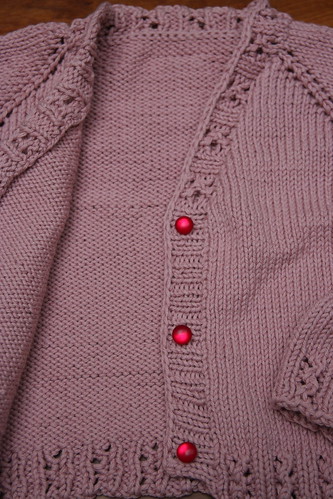
For the ribbing I used Pattern #79 (Lace Rib) from Vogue Knitting Stichionary 1 (homemade chart here if you're interested. As previously mentioned, Dev picked the buttons that fit just perfectly in the YO holes of the ribbing, so for the neck band I just picked up stitches all the way around the neck, worked 6 rows of the pattern and bound off. I kept the band on the left front in solid k2, p1 ribbing to make sewing the buttons on easier.


Devil cardi button band

A quick soak in cool water, a spin out in the washing machine and voila! Pink perfection. Except for those damn wonky stitches that are still there. I console myself with the knowledge that Dev will never notice.

Maybe. ;-)

FF: Grab your sunglasses

Because this stuff is retina searing:

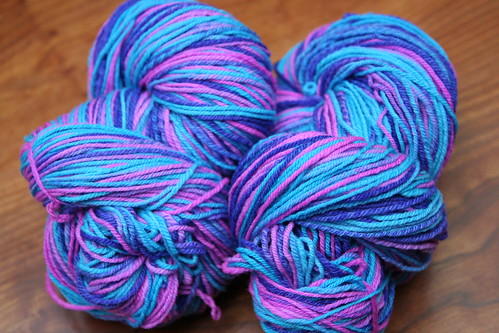
Dev's merino handspun

Devil's merino handspun, 8.1 oz/229 gr, about 575 yds, 13-14 wpi (fingering weight).
Spun/plied at 12:1 on ST Lendrum.

Fiber from Yarn School, dyeing by me and Dev, spinning by me (with much "Are you done with my yarn yet?" from Herself). Dev has requested a blanket made from this stuff, so I chain plied to keep the stripes intact. I'm envisioning a garter stitch edged triangular shawl type thingie, with a central column of double YOs and YOs on each edge just inside the garter stitch border. That will give me lots of stripes and a non-curling edge. And make it something she can wrap up in as needed.

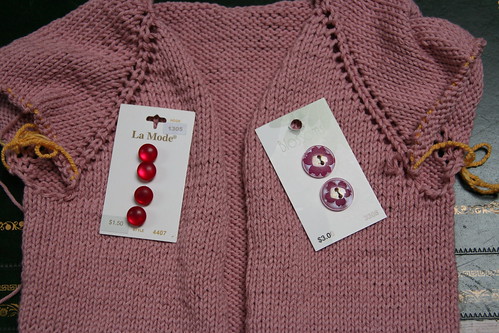
I've also finished the body of her sweater. It's quite gratifying to find that she is rather excited about it. Or at least marginally enthusiastic. I even interrupted her viewing of 101 Dalmatians to ask for input on the buttons and didn't get my head ripped off and stuffed down the stump of my neck. So she must like it!


Devil's cardi in progressButtons for Devil's cardi

I got the flower buttons specifically with her in mind, but to my surprise she picked the pinky red ones. Which is great because I can do the same ribbing that's on the bottom as a button band and not have to worry about buttonholes.

Here's hoping that a good blocking takes care of the wobbly stitches. Damn cotton will get me every time!

First top-down raglan

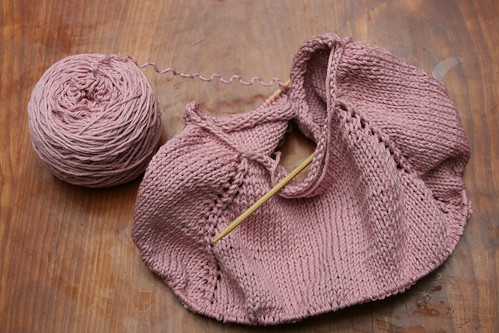
Having now moved massive amounts of yarn across several thousand miles of ocean, I am seriously motivated to do some stash-busting. Three skeins of pink Cotton Fleece have been calling out to become a cardigan for a certain wee Devil, so last week I cast on.


Devil's pink cardi yoke

Size 6 needles (4.0 mm), a couple of hours in front of ITV1 with Barbara Walker's "Knitting from the Top", and I've got a finished yoke. I'm using yo increases along the raglan lines to make it a bit lacy, and I'm really liking it. Devil helped me wind the yarn cakes, so she's feeling involved as well. Good times. And it's zooming along - I'm hoping to finish it this week, and I've got some pretty flowery buttons in my stash that I picked up for just this sort of project.

The girls seem to be adjusting to the UK pretty well, particularly since we've gone to visit a Princess Castle...


Leeds Castle

What more could you ask for?

That screeching sound you hear is the brakes

Being put on the Aleita Shell.

I had been cranking along in good style on this piece. Did both fronts, noticing and fixing my annoying edge mistake on the left front before it became visible, successfully negotiating neckline and armhole shaping without too much recounting and/or swearing. So I moved on to the back, feeling quite swell about how things were going.

I had noticed when I started the ribbing for the bodice that my stitch counts did not match the ones in the pattern. I don't know if I cast on a some extra stitches or if there's a mistake in the pattern, but in any event, I had an extra stitch on each front and two extra on the back.

This was not a big deal when working the fronts in pattern; I just kept that extra stitch as a purl on the right front and mirrored it on the left. But for the back, my mind apparently went on vacation stopped working had a serious brain fart, because I started the ribbing as directed in the pattern. It took me longer then I care to admit to realize that this meant that the ribbing on the back was shifted to one side by a stitch.

Being categorically averse to tinking unless there is no other option, I elected to soldier on, figuring that a one stitch shift wasn't going to be noticeable.

Can you see the storm clouds gathering? Yup, me too. Might be hail up there as well - best take cover.

This was the case until I got through the armhole decreases on the back. And I realized that on one side of the back, it looked like this: (I = knit stitch, O = purl stitch, offending stitches are blue):

IOOOOIOIOI

And on the other side it looked like this:

IOIOOOIOOOOI

It may be hard to visualize from those representations, but on one edge it looked like k1 p1 ribbing next to a large purl block, and on the other it was k1, p1, k1, p3, k1, purl block. Not a big difference, but for some reason, every time I did another right side row, it bothered me more and more.

Now the smart person would have stopped there (a couple inches into the armholes) and, either ripped back to the start of the bodice (HAHAHAHAHAHAHAHA! Oh hell no!), or dropped back the offending, miscentered k1 columns on the right side, replacing them with a purl column and shifting over the knit column to the right location. Guess what I did.

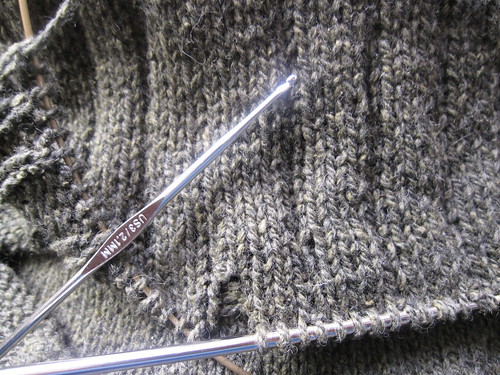
Aleita shell repair

That's 12 inches of back ribbing. 12. One.Whole.Foot.

Aleita shell repair

This is going to take a long time. 13 sets of columns to be fixed. I'm on number 5.

My armholes are 7 inches. I am not smart.